How to Create a Travel Photo Gallery Wall in Your Home
Creating a travel photo gallery wall is one of the most meaningful ways to bring your favorite memories into your home. Instead of leaving those moments tucked away on your phone or hard drive, you can turn them into a thoughtful wall display that reflects where you’ve been, what you love, and the experiences that shaped you.
In this guide, I’ll walk you through how to create a travel gallery wall that feels cohesive, intentional, and visually balanced—from choosing the right photos and narrowing your theme to planning the layout and styling the finished wall.
Short answer?
The best travel gallery walls are built around a clear story, a consistent visual style, and a layout that feels collected rather than cluttered. One larger anchor piece often helps the whole wall feel more intentional.
How to Create a Travel Photo Gallery Wall
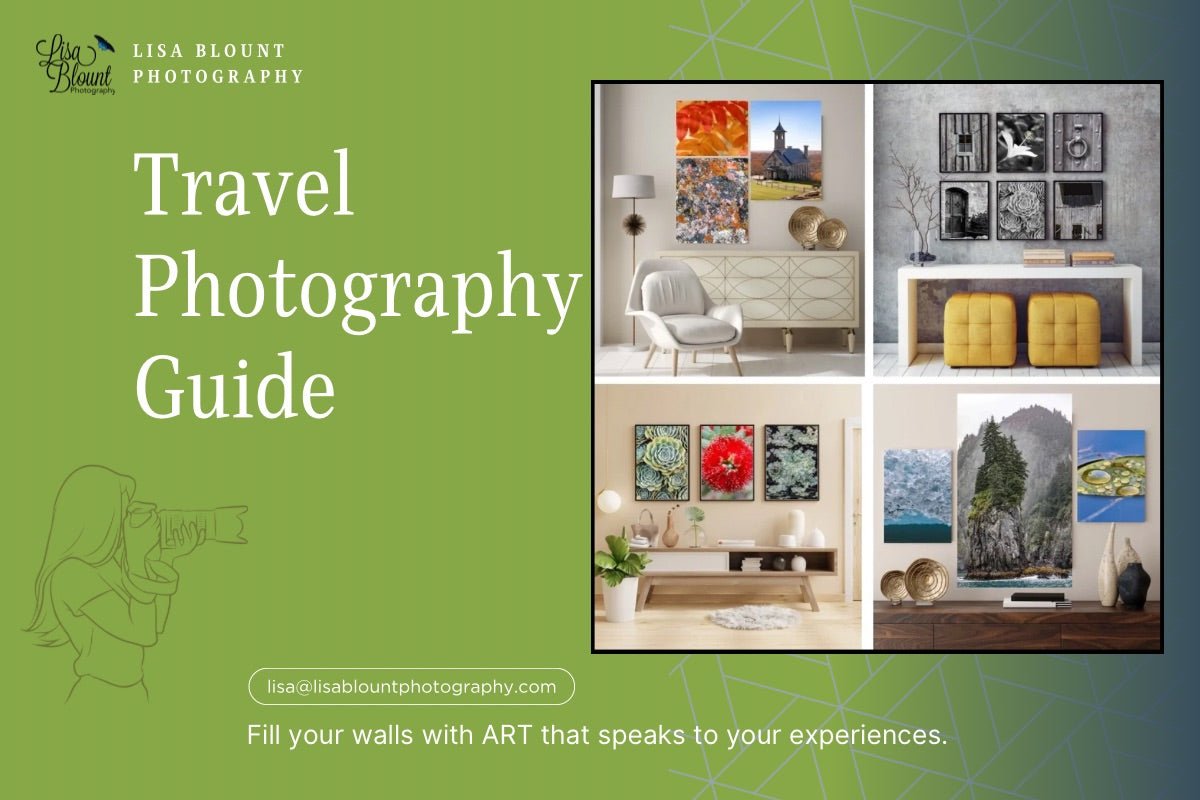
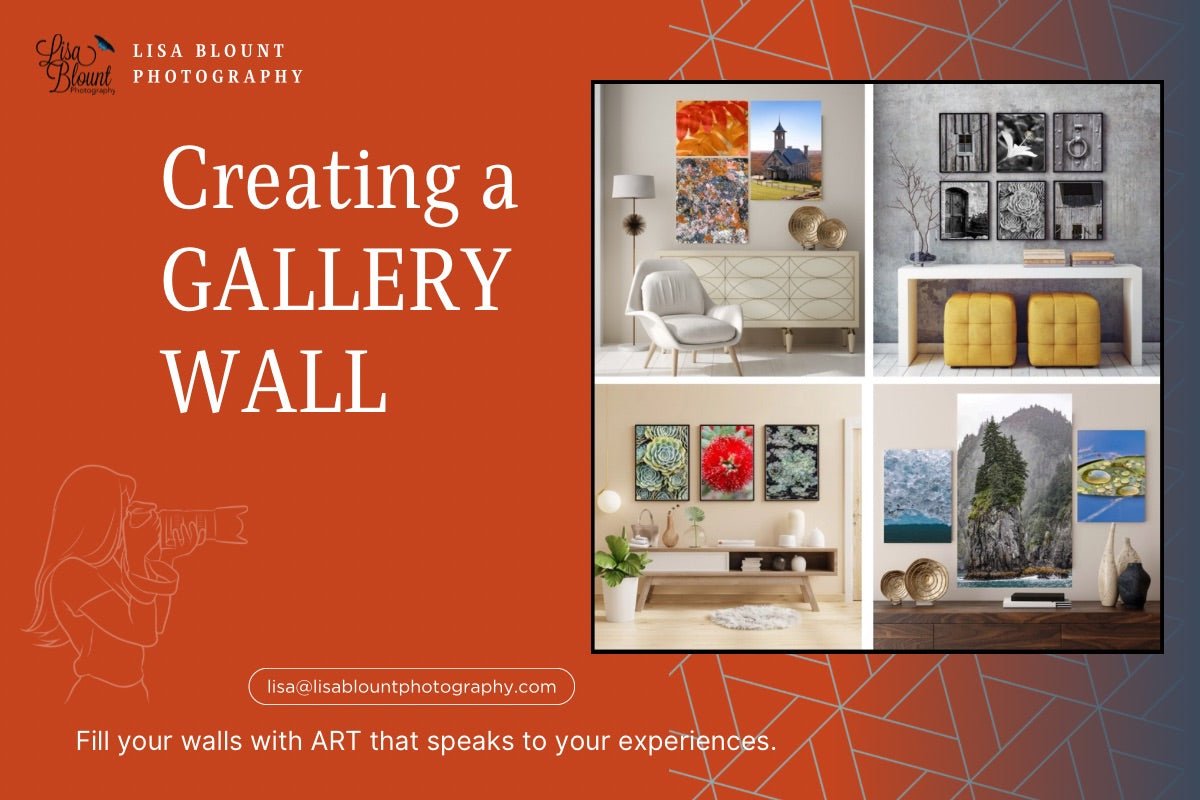
When we re-did our living room, one of my favorite decisions was creating a gallery wall built around places that meant something to us. Ours includes memories from Alaska, Napa Valley, and the Chihuly experience at Crystal Bridges—each one tied to a place, a feeling, and a story worth keeping close.
That is what makes a travel photo wall different from a generic gallery wall. It is not just about filling space. It is about curating images that hold meaning, then arranging them in a way that feels polished, personal, and connected.
Whether you want to feature one unforgettable trip or mix favorite moments from several destinations, the goal is the same: create a display that feels collected, not cluttered—and that brings your experiences back to life every time you walk by.
I love to travel, and I always have a camera with me. For me, photography is part of how I hold onto a place—the colors, the atmosphere, the details, and the feeling of being there. A travel gallery wall gives those memories a place to live beyond a screen, so they can become part of your everyday space.

1. Start with a Theme or Story
Before diving into your travel photos, decide what you want the wall to say. Do you want to focus on one unforgettable trip, such as Alaska or Italy? Or do you want a broader story like coastal escapes, mountain adventures, favorite cities, or natural wonders?
Choosing a theme helps the wall feel curated instead of random. It gives your gallery direction and makes it easier to choose pieces that belong together, even if they were captured at different times or in different places.
If you are having trouble narrowing it down, start with the destination or experience that still feels strongest to you. The wall does not need to tell every story at once.
A travel gallery wall is a curated collection of photographs from meaningful destinations—designed to tell a story through place, color, and memory. Unlike traditional gallery walls, travel photo walls focus on personal experiences, creating a cohesive visual journey rather than a mix of unrelated art.
Want your travel gallery wall to feel more polished?
Start with one larger fine art photography piece as the anchor, then build around it with smaller travel photos, maps, or meaningful details. A strong focal piece helps the whole wall feel collected instead of cluttered.
2. Choose Your Best Travel Photos
Once you have your theme, pull together the photos that best represent it. Look for images that carry emotion, atmosphere, or a strong sense of place—not just snapshots that prove you were there.
Aim for a mix of:
- Wide shots that set the scene
- Close-up details that add texture and interest
- One or two standout images that can act as stronger focal points
Quality matters more than quantity. A strong travel gallery wall does not need every image from a trip. It needs the right ones.
And yes—this is often the hardest step. If you loved the experience, it is hard not to choose everything. But a little restraint here will make the finished wall much stronger.
 |
 |
 |
3. Choose a Consistent Style or Edit
A travel gallery wall looks strongest when the images feel visually connected. That does not mean they all need to be identical, but they should share something in common—similar tones, a repeated finish, a consistent framing approach, or an overall editing style.
This is one reason travel-inspired fine art can work so well in a gallery wall. Professionally edited and printed pieces already carry a more cohesive visual language, which helps the overall display feel intentional and elevated.
What’s the difference between a gallery wall and a travel gallery wall?
A travel gallery wall is intentionally built around destinations and experiences, using photography to tell a cohesive story rather than mixing unrelated artwork.
4. Plan Your Layout Before You Hang Anything
Once you’ve chosen your images, plan the layout before you put holes in the wall. This is where many gallery walls either start to sing—or start to feel chaotic.

Popular travel gallery wall layouts include grid layouts for a clean look, salon-style walls for eclectic collections, and centered layouts anchored by one large travel photograph.
Common layout options include:
- Grid layout: Best for a clean, structured look with similarly sized pieces.
- Salon style: Great for a more collected, eclectic feel with varied sizes.
- Centered layout: One large focal piece surrounded by smaller supporting images.
- Linear layout: Ideal for hallways, stairwells, or above furniture.
Before hanging, lay the arrangement out on the floor or map it digitally. I often mock mine up in Photoshop, Canva, or Goodnotes first because it helps me see the balance more clearly.
Want a simpler, more polished look?
A centered layout anchored by one stronger travel-inspired statement piece often feels cleaner and more elevated than trying to make every image work equally hard.
If you’re drawn to larger statement pieces from your travels, you may enjoy exploring my Large-Scale Travel & Nature Art Collection, which works beautifully as a central anchor in a gallery wall.
Travel Gallery Wall Ideas for Different Spaces
The best travel gallery wall is not just about the photos—it is also about where the wall will live. A hallway, stairwell, living room, or home office may call for a different layout, scale, or editing approach.
Living Room
A living room gallery wall usually works best when it feels anchored and intentional. Try building around one larger focal piece, then layer in smaller travel photos or related artwork around it. This keeps the display from feeling too busy while still telling a broader story.
Hallway or Entryway
Hallways are perfect for a linear or evenly spaced layout. Because people move through these spaces quickly, a cleaner arrangement often feels stronger than an overly complex one. A hallway travel wall can work beautifully as a visual timeline of favorite trips or destinations.
Stairwell
Stairwells are ideal for gallery walls with a little more movement. A stepped layout that follows the rise of the stairs can feel natural and visually interesting, especially when the photos share a similar color palette or finish.
Home Office or Reading Nook
Smaller spaces are a great place for a tighter, more curated arrangement. A compact travel photo wall can bring personality and inspiration into a workspace without overwhelming it. In these settings, consistency in editing and frame style becomes especially important.
No matter where your gallery wall goes, the goal is the same: choose a layout that fits the architecture of the space and lets your travel memories feel collected, cohesive, and easy to enjoy.
5. Mix and Match Frames—But Keep It Controlled
The choice of frames has a big impact on the finished look. If you want the wall to feel calm and modern, repeating the same frame color or finish often works best. If you want something more collected and eclectic, mixing materials can work beautifully—as long as there is still some visual rhythm.
Too much variety can make the wall feel chaotic rather than curated. A balanced mix is usually stronger than total freedom.
Personally, I often prefer frameless acrylic presentation for larger travel-inspired pieces because it keeps the look modern and lets the photography itself do the work.
Not sure which finish is right for your space?
If you’re comparing acrylic vs metal prints, this guide walks through the differences between TruLife® Acrylic, ChromaLuxe Metal, brushed metal, and canvas so you can choose the best fine art photography finish for your home, office, or healthcare space.
6. Add Personal Touches Carefully
You can absolutely include maps, postcards, tickets, or small souvenirs if that fits your style. These can add personality and help tell the story behind the trips.
But if you want the wall to feel more elevated and less scrapbook-like, use these elements sparingly. Sometimes the photographs alone are enough. For me, the more personal memorabilia tends to stay in albums or scrapbooks, while the wall art itself carries the emotional tone of the space.
7. Use Lighting to Finish the Look
Lighting can elevate a gallery wall dramatically. Picture lights, sconces, track lighting, or natural light can all help the photographs feel more intentional and more integrated into the room.
If your wall gets direct sunlight, be thoughtful about materials and placement. Professionally produced artwork and protected finishes help, but good placement still matters.
How to Keep a Travel Gallery Wall from Feeling Cluttered
If you want the wall to feel elevated instead of busy, edit more than you think you need to. Strong gallery walls usually have:
- a clear theme or story
- a controlled palette or visual style
- one or two stronger anchor pieces
- enough breathing room between images
- a layout that fits the wall and furniture around it
That is often the difference between a travel wall that feels meaningful and one that feels random.
Need a stronger anchor piece?
Browse my Large-Scale Travel & Nature Art Collection for oversized pieces that can help a gallery wall feel more intentional and complete.
Need an Anchor Piece for Your Travel Gallery Wall?
If your travel gallery wall is starting to feel too busy, one larger anchor piece can help bring everything together. A statement-size fine art photograph gives the wall a clear focal point, while the smaller images around it can support the story instead of competing for attention.
For travel-inspired interiors, I especially love using landscapes, water imagery, mountain scenes, architectural details, or destination-based photography as the main visual anchor. These pieces help the gallery wall feel personal, but still polished enough for a living room, hallway, office, or entryway.
Looking for the piece that brings the whole wall together?
Browse large-scale travel and nature photography designed to work as anchor art for gallery walls, statement spaces, and meaningful destination-inspired interiors.
Wrap Up
Creating a travel-inspired gallery wall is a beautiful way to bring the world into your home and keep your favorite experiences alive. The best ones are not built by using every photo you have—they are built by choosing the right images, shaping them into a clear story, and giving them room to breathe.
When done well, a travel gallery wall becomes more than decoration. It becomes a personal map of where you’ve been, what you love, and what you want to keep close in everyday life.
Ready to start building yours?
Explore the Large-Scale Travel & Nature Art Collection, browse destination-inspired pieces like Aboard Alaska and TA Moulton Barn, or request a Design Preview if you want help choosing an anchor piece for your wall.
Happy decorating!! ~ Lisa